| Step 1: Open the Sequence Editor |
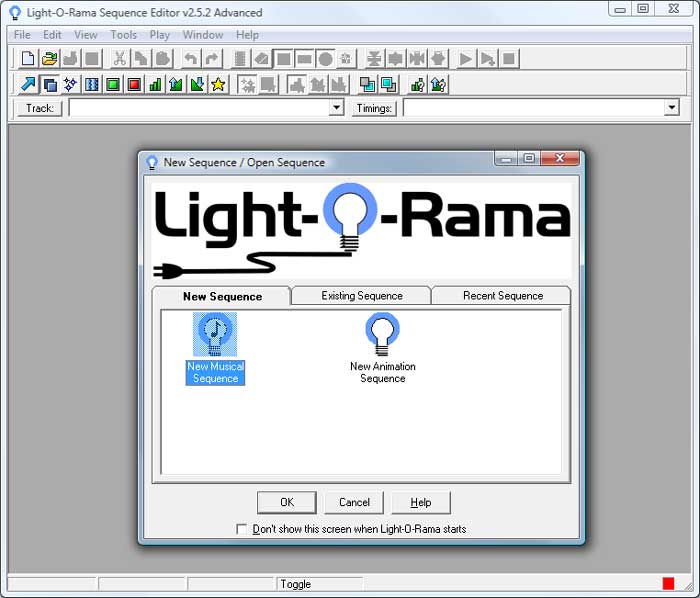
To open the Sequence Editor click Start > All Programs > Light-O-Rama > Light-O-Rama Sequence Editor
Click New Musical Sequence and click OK.
|
| Step 2: Select Audio File |
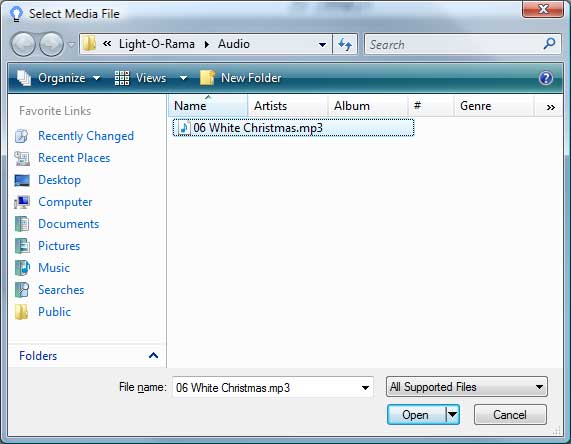
Select the audio file you will use to create the sequence and click Open.
Note: It is recommended that you copy audio files to the Light-O-Rama Audio folder.
Here are the locations of the Light-O-Rama Audio folder:
Version 2.0 or newer: My Documents\Light-O-Rama\Audio
Version 1.6.3 - 1.6.X: Shared Documents\Light-O-Rama\Audio
Version 1.6.2 - older: C:\Program Files\Light-O-Rama\Audio
If you have the music on CD you can follow these instructions to create your audio files:
How to prepare music files/rip music
|
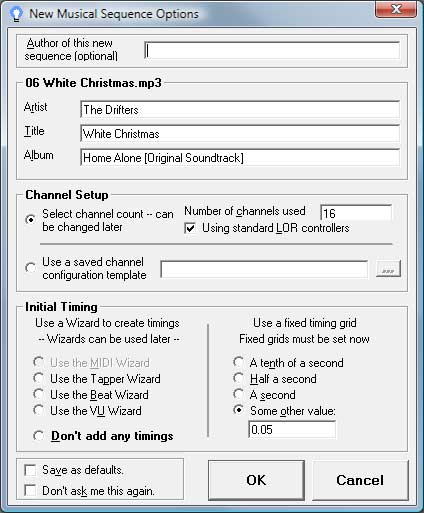 |
Enter your name as the author of the
sequence. (Optional)
Enter the information about the music.
Select the number of channels to include in the sequence or select a Channel Configuration Template previously exported from another sequence. (To Export Click Edit > Export Channel Configuration)
For the initial timing we recommend selecting "Some other value" and entering 0.05 or 1/20 of a second.
Select "Save as defaults" and click OK |
|
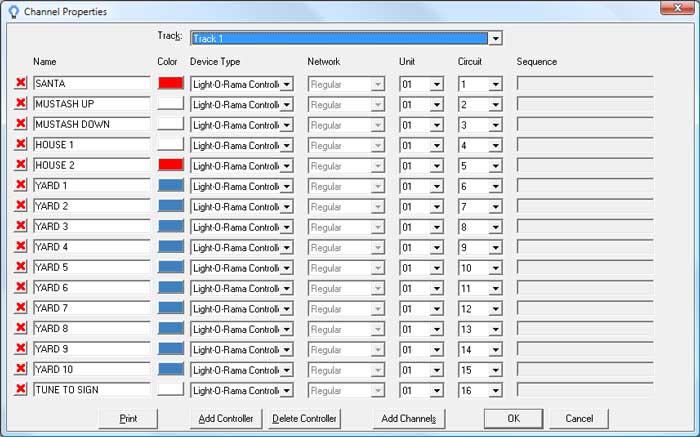
Unless you selected a Channel Configuration Template in step 3 you will need to assign your channels. Below is an example of a sequence with no channels assigned.
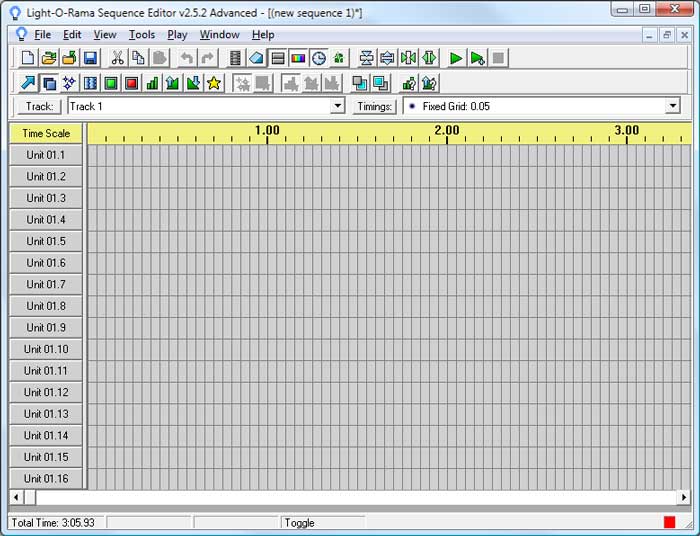
The easiest way to assign channels is by using the Channel Property Grid, which allows you to set the Name, Color, Device Type, Network, Unit, and Circuit of each row in the Sequence. To open it click Tools > Channel Property Grid.
|
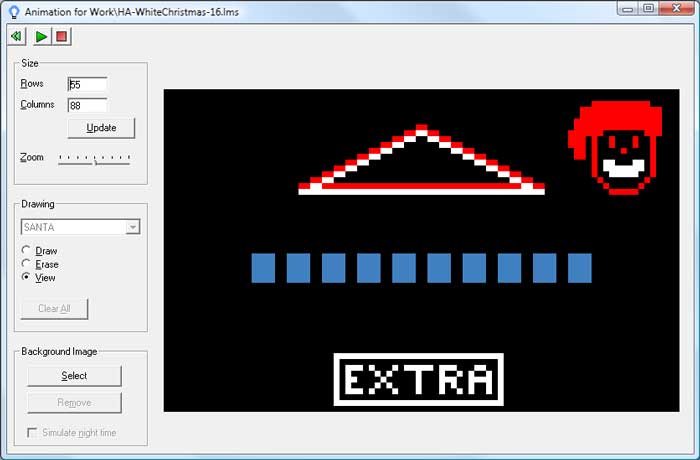
To help preview the sequence in the Sequence editor you can draw an animation, which will light up as you play the sequence. To open the animation screen click the "View Animation" button on the toolbar (looks like a film strip) or click View > Animation.
You can select an image of you house by clicking Select under Background Image.
To draw the animation select Draw under Drawing and then select the output to draw from the drop down menu. Click the grid boxes to the right to draw the output in your animation. Repeat the process for all of your outputs.
To erase a box select Erase and then erase the box. Right clicking will also erase a box.
|
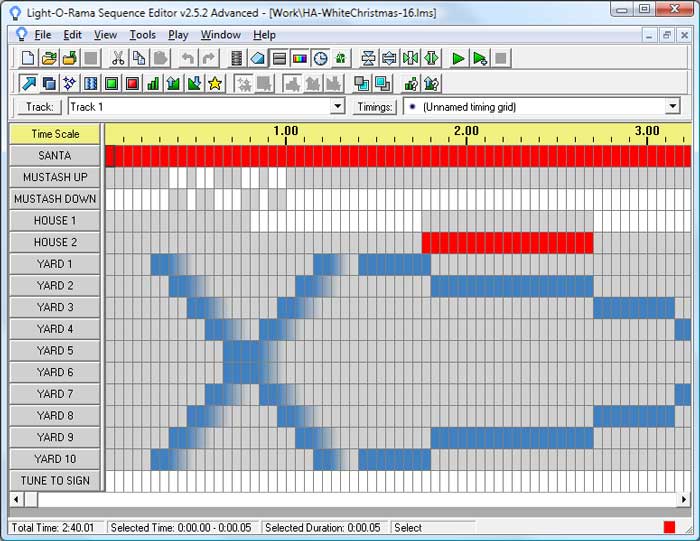
Enter timing into the sequence to tell the different outputs when to do different effects. The different effects can be selected from the Tools menu or from the Tools toolbar. If you put the mouse over each of the buttons in the toolbar it will pop up a window to tell you what each button is.

Select the effect you would like to add to the sequence and click the box in the grid where you would like to add the effect. You can also click and drag to do an effect on multiple channels or over several boxes in the grid.
To preview the sequence click
the green play button in the tool bar. (Looks like a green right arrow) If you have an animation you can click the animation button (film strip in the toolbar) and then click play.
To only play part of the sequence click Play > Play Range and then select one of the options. For example you could select Visible screen and then when you click the play button it will only play the part of the sequence you are looking at on the screen.
If you make a mistake you can press Control-Z to undo the previous change and Control-Shift-Z to redo a previously undone change.
|
To save your sequence Click File > Save, enter a name, and then click Save. It is recommended to save every few minutes.
|